Browser Extension - Arweave gateways in ArConnect
What are Arweave gateways and its integration with ArConnect?
Read more
Adding users as contacts in ArConnect enables for quicker transactions.
Instead of having to add the recipient details for every transaction, for regular transactions, the recipient can instead be selected from the list of existing contacts.
Follow these steps to add a new contact:
Open ArConnect..
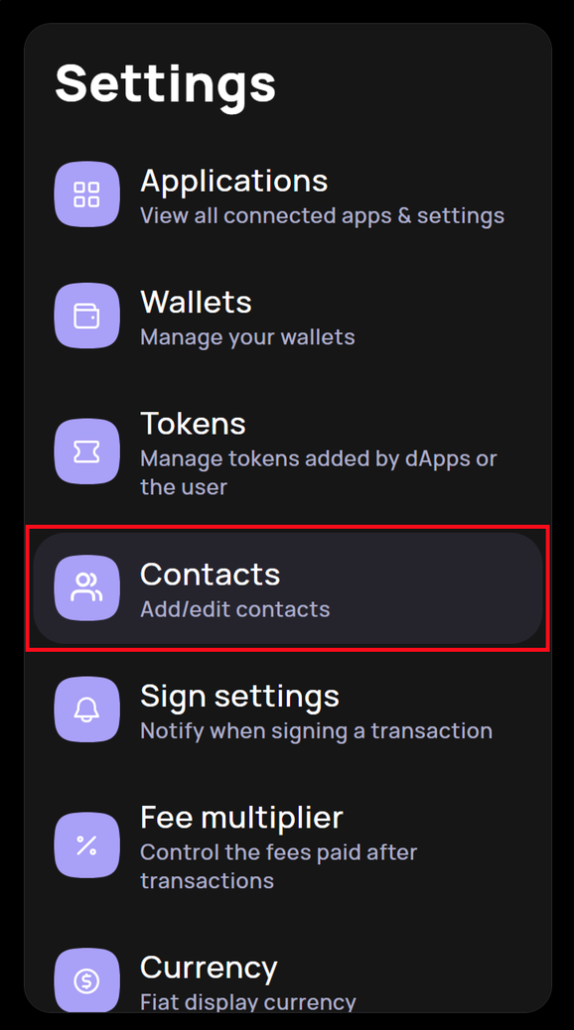
Click the “settings” icon on the extension’s main view.

Select the “Contacts” setting from the sidebar.
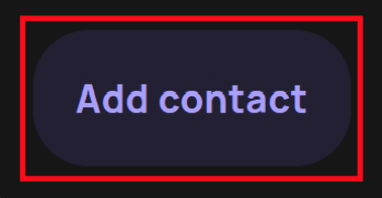
Click the “Add contact” button located at the center of the Settings Page.
A form is displayed on the right hand side of the Settings Page.
Fill in the details requested in the form as you wish
Enter the wallet address if not specified. This is the only detail that is required.
Optionally, you can upload an avatar for the contact by clicking on the upload icon.
Optionally, pass in a first and last name for the contact
Optionally, Include any relevant notes or details about the contact for reference.
Once all details are filled in, click on the "Save New Contact" button located at the bottom of the form to add the contact to your list.

The newly added contact will now appear in the center screen of ArConnect, ready for use in transactions.
Follow these steps to update an existing contact:
Open ArConnect.
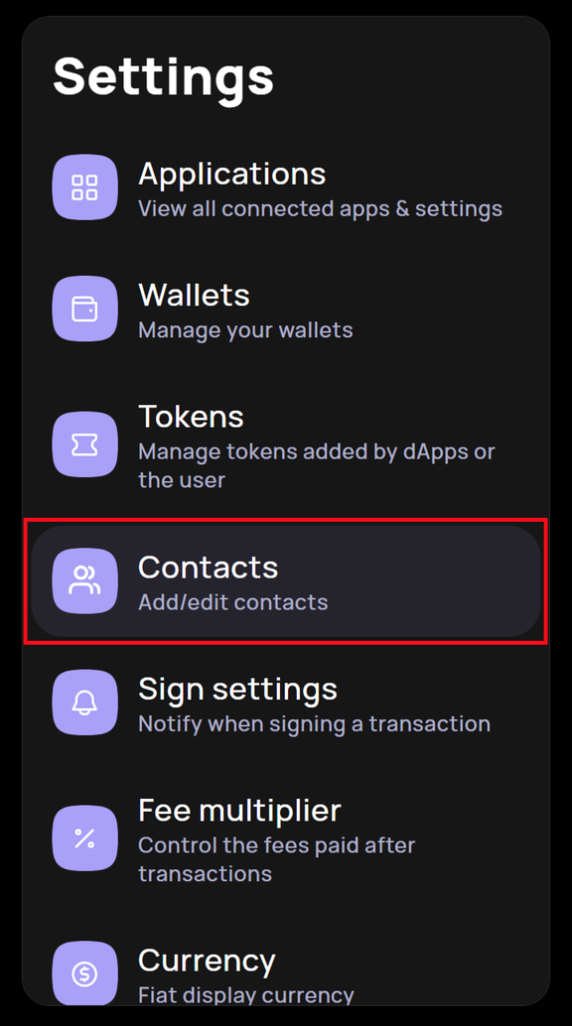
Click the “settings” icon on the extension’s main view.

Select the “Contacts” setting from the sidebar.
Search for the desired contact from the list of contacts located in the center of the Settings Page.
A preview of the existing contact details for the chosen contact is displayed at the right hand side of the Settings Page.
Click the “edit” icon located at the top right next to the title “Contact Info”.

This displays the form to update the details.
Update the details as needed.

Click “Save changes” located at the bottom of the form to confirm the updates.
Follow these steps to update an existing contact:
Open ArConnect..
Click the “settings” icon on the extension’s main view.
Select the “Contacts” setting from the sidebar.
Search for the desired contact from the list of contacts located in the center of the Settings Page.
A preview of the existing contact details for the chosen contact is displayed at the right hand side of the Settings Page.
Click the “edit” icon located at the top right next to the title “Contact Info”.
This displays the form to update the details.
Click “Remove contact” located at the bottom of the form.
The contact is removed from the list located at the center of the Settings Page.
What are Arweave gateways and its integration with ArConnect?
Read moreIf you haven't found help in our knowledge base, you might have encountered an issue we haven't heard about yet. Do not panic, we're still here to help! Below you can seek support from our team directly on Discord.
Get help
We use cookies to better understand customer needs